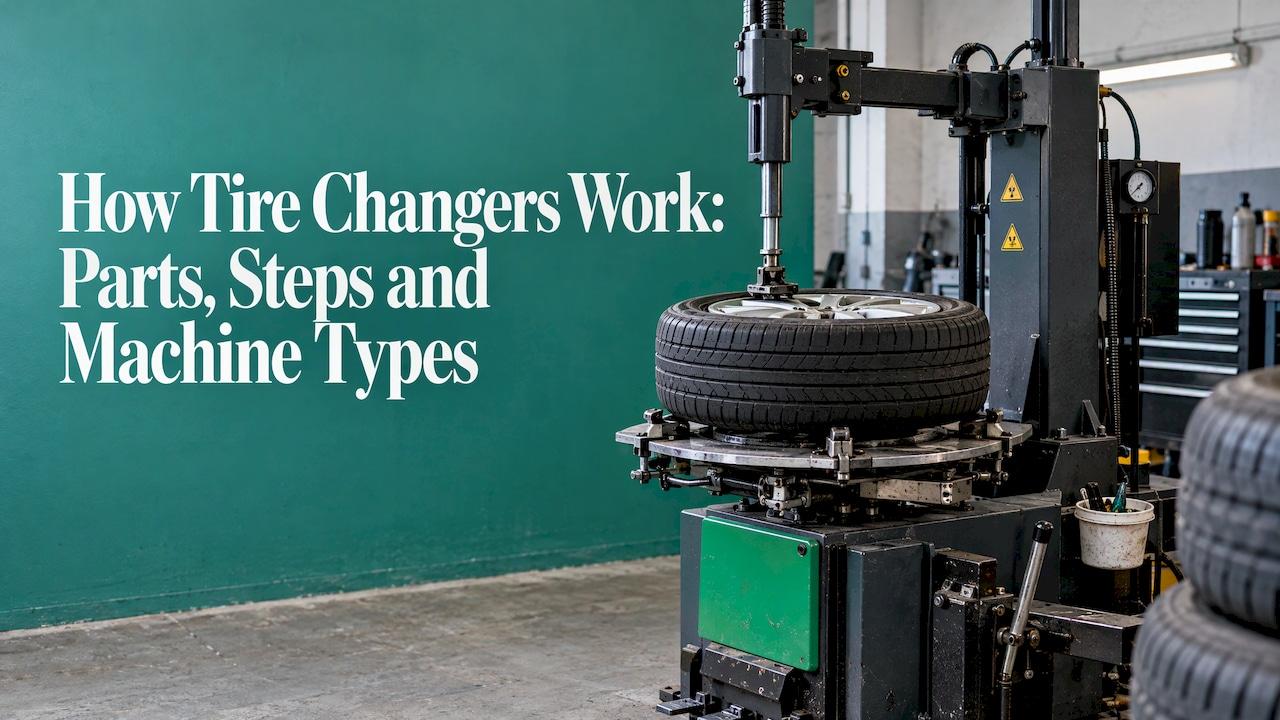
A tire changer works in three moves. A bead breaker pushes the tire's edge off the rim. A clamped, rotating turntable spins the wheel while a mount/demount head lifts the bead over the rim lip. An inflation system then reseats the bead. Once you know what each part does, the whole job makes sense, and so does the choice between a manual, swing arm, tilt-back or leverless machine. If you are equipping a bay, our wheel service equipment comes with free shipping, a price-match guarantee and a 12-month warranty.
TL;DR
- A tire changer has four working groups: a bead breaker, a turntable with clamping jaws, a mount/demount head on an arm, and an inflation system.
- The job runs in a fixed order: deflate, break both beads, clamp, lubricate, demount, mount, inflate. Bead seating is normally limited to 40 psi unless the manufacturer says otherwise.
- Swing arm, tilt-back and leverless machines differ mainly in how much they do for you, how fast they are and which wheels they handle well.
- A wheel balancer is the partner machine. Dynamic balancing corrects both vertical and side-to-side imbalance, which is why it is the standard for modern wheels.
Table of Contents
- What a tire changer actually does
- The main parts and what each one does
- How to use a tire changer, step by step
- Safety: inflation is the dangerous step
- Tire changer types: manual, swing arm, tilt-back and leverless
- How to choose the right machine
- Wheel balancers: the partner machine
- Where we come in
- Our view
- FAQ
- Sources
What a tire changer actually does
A tire is held on a wheel by two stiff steel-reinforced edges called beads. They sit in a shelf on the rim and are held there by air pressure. Taking a tire off by hand means fighting those beads with pry bars. A tire changer replaces that fight with leverage, a rotating table and a head that guides the bead where it should go.
The machine does not remove the effort. It controls it. The bead breaker supplies the large force, the turntable supplies rotation, and the head supplies precise guidance, so the tire and rim take less abuse than they do under tire irons.

The main parts and what each one does
Bead breaker
The bead breaker, often a side shovel or paddle driven by an air cylinder, presses against the tire sidewall close to the rim and pushes the bead off its seat. Vehicle Service Pros' step-by-step procedure says to deflate the tire first, repeat the break at the 6 o'clock position, then do the same on the inner bead.
Turntable and clamping jaws
The turntable holds the wheel and rotates it. Jaws grip the rim, either from the outside edge (outside clamping) or from the inside edge (inside clamping). Which one you use depends on the wheel. Alloy and low-profile wheels with delicate finishes are the usual reason to be careful here, because a jaw that slips can scar the rim.
Mount/demount head
The head, often called a duckhead because of its shape, guides the bead over or under the rim edge. It sits on a vertical shaft and arm that position it close to the rim and lock it in place. Many machines use a tilt-back column or a swing arm to move the head out of the way when you load the wheel.
The gap between the head and the rim is set so the head never touches the rim surface. That small clearance is what protects the wheel's finish. If it is set too wide, the bead can slip back off the lever. If it is set too tight, the head can mark the rim.
Pedals and controls
Foot pedals run the turntable in both directions, open and close the jaws, trigger the bead breaker and, on many machines, control inflation. The same component guide lists the inflation hose, gauge and air system as the parts used to inflate the mounted tire. Foot controls matter because both hands stay on the tire.
Inflation system
The air system seats the beads and brings the tire to pressure. Better machines add a restraint or a controlled inflation function, which brings us to safety.
How to use a tire changer, step by step
The sequence below follows the procedure in Vehicle Service Pros' guide. The notes on where each step goes wrong are the practical part.
- Prepare the wheel. Clean and inspect the tire and rim. Remove the old wheel weights and the valve core so the air can escape completely. Look for bent flanges, corrosion on the bead seat and cracks. Mistakes here show up later as slow leaks.
- Release the air. The tire must be fully deflated before you touch the bead breaker. A tire with air left in it fights the shovel and can pinch the operator's hands.
- Break both beads. Set the shovel against the sidewall close to the rim, not on the rim itself, and press. Repeat at several points around the tire until the bead is free. Do the same on the other side. A stubborn bead, common on older tires and on alloy wheels that have sat for years, needs patience, not more force at one spot.
- Clamp the wheel. Put the wheel on the turntable and clamp it. Check that the jaws are seated, then lock the mount/demount head against the rim. If the wheel is not centered and tight, it will wobble and the head will track badly.
- Lubricate the beads. Apply tire mounting paste or lubricant to both beads and the rim edge. Dry beads stretch, tear and can stick, and lack of lubrication is a leading cause of damaged beads.
- Demount. Position the upper bead on the head's lever, step on the pedal, and rotate the table so the head pulls the bead over the rim. Then lift out the second bead the same way, or lift the lower edge over the head.
- Mount the new tire. Place the tire on the wheel and position the lower bead to the right of the head. Rotate the table to bring the bead over the rim edge. Follow with the upper bead. Keep the bead in the drop center (the recessed channel in the middle of the rim) as you go, because that gives the slack that lets it clear the flange.
- Inflate and seat. Inflate until both beads pop onto their seats. The procedure sets a maximum of 40 psi (2.76 bar) for seating. Then bring the tire to the pressure on the vehicle placard.
The same guide stresses that bead position, lubrication and controlled inflation matter because mistakes can damage the tire or the machine.
Safety: inflation is the dangerous step
Mounting is mostly a skill problem. Inflation is a safety problem. A tire that is mismatched to its rim, or inflated beyond the manufacturer's recommendation, can fail violently.
California's workplace rules show the standard that many shops work to. Title 8, section 3325 requires employee instruction on correct tire-to-rim matching, and says tires must not be inflated beyond the manufacturer's recommended pressure. Unless the manufacturer recommends otherwise, bead seating is limited to 40 psi and requires a restraint device, with listed exceptions. It also requires a clip-on chuck with at least a 24-inch hose and an in-line valve and gauge, or specified equivalent controls, so the operator stands clear of the tire while it fills. That rule covers California workplaces. Check your own state's occupational safety rules if you operate elsewhere.
Practical habits that follow from it:
- Confirm the tire size matches the rim diameter and width before you mount.
- Never exceed the seating pressure on the sidewall or the maker's guidance.
- Keep hands and head out of the line of a tire being inflated.
- Inspect the inflation hose, chuck and gauge for wear before each shift.
Tire changer types: manual, swing arm, tilt-back and leverless
Machines differ in how much work the operator does and which wheels they handle. Here is the general picture.
| Type | How it works | Best suited to |
|---|---|---|
| Manual (bench or floor-mounted) | Operator turns the wheel or table by hand and uses bars and a bead breaker lever | Occasional DIY use, a tight budget, small garages |
| Swing arm | Arm swings the head away for loading; air-powered turntable and bead breaker | Everyday passenger car and light truck work in a busy shop |
| Tilt-back | Column tilts backward to clear the wheel and lock the head position | Fast, repeatable work for tire shops |
| Leverless | Head tool and a mechanical arm replace the pry lever, often with a wheel lift | Low-profile, run-flat and large alloy wheels, high volume |
The categories overlap. Some swing arm machines have helper arms, and some tilt-back machines can handle many specialty wheels. What matters is how the machine's features match your wheel mix. Vehicle Service Pros reports that low-profile and run-flat assemblies made up nearly 60% of OEM assemblies in the market context of its 2014 guide, which is why a specialty-capable machine matters more than a conventional one alone for any shop serving modern vehicles.
Manual machines
Manual changers are the entry point. They use a bead breaker and bars, with a clamp that holds the wheel. They are slow and demand technique, but they cost much less and take little space. For a home garage that changes a handful of tires a year, they are a practical start.
Swing arm machines
Swing arm machines are the workhorse of the average shop. The arm positions the head, an air-driven turntable spins the wheel, and the bead breaker does the hardest work. They handle most standard passenger and light truck tires and are straightforward to learn.
Tilt-back machines
Tilt-back machines move the column back so you can load the wheel with a clear workspace. The head returns to the same set position each time, which speeds up repeat work and suits a shop that changes tires all day.
Leverless machines
Leverless machines replace the pry lever with a controlled tool and arm. That makes them gentler on low-profile, run-flat and big-diameter wheels, and they often include a wheel lift to save your back. They cost more, and they pay off where the wheel mix is demanding and volume is high.
How to choose the right machine
Start with the wheels, not the catalog price.
- Wheel mix. If most of your jobs are low-profile, run-flat or large alloy wheels, look at leverless or a machine built for specialty tires.
- Volume. One or two tire jobs a week is a different decision from twenty a day. Higher volume rewards speed and ergonomics.
- Clamping range. Check the minimum and maximum rim diameter, inside and outside, against the wheels you actually see, including truck and trailer.
- Power supply. Check the air and electrical requirements before ordering. Some machines need a 220V supply.
- Wheel handling. Wheel lifts and helper arms protect the operator and the wheel, which counts when the wheel weighs as much as a heavy alloy does.
- Warranty and support. A machine that earns its keep runs every day. Warranty terms matter more than a small difference in price.
Wheel balancers: the partner machine
Once a tire is mounted, the assembly needs balancing. The weight is never perfectly even around the tire and wheel, and a heavy spot makes the wheel vibrate at speed.

There are two basic kinds of imbalance. The U.S. Navy training manual explains that static imbalance causes wheel hop or tramp, while dynamic imbalance can cause both vertical vibration and side-to-side shimmy. Static balancing distributes mass evenly around the axis. Dynamic balancing corrects imbalance on one or both sides of the wheel centerline, with weights placed where the machine indicates.
Types of wheel balancing machines
- Static (bubble or single-plane) balancers. They correct one plane only. They suit narrow wheels and some specialty uses such as motorcycle wheels.
- Dynamic (computerized spin) balancers. The wheel spins on a shaft, sensors read the imbalance on two planes, and the screen tells you where to put weights. This is the standard in modern shops.
- Road force balancers. These add a roller that presses on the tire to simulate load, and so find problems that a plain spin does not, such as stiffness variation in the tire.
A German equipment maker's product catalog says balancing improves driving comfort, reduces wear and improves handling and braking, and describes counterweights as correcting both static and dynamic imbalance. A changer and a balancer are therefore bought as a pair: the first mounts the tire and the second makes it run true. You can browse wheel balancers alongside the changers in the same category.
Where we come in
We supply automotive tools and equipment to professional mechanics, DIY users and shop owners: car lifts, tire changers, wheel balancers, diagnostic scanners, air compressors, hand tools and garage storage. Every product has a 12-month warranty, free shipping and a price-match guarantee. Our wheel service range is where the changer and balancer pairing described above is easiest to plan, and our wheel lifts take the heavy lifting off the operator.

If you are setting up a bay, a lift, a changer and a balancer are the core equipment. See the full car lift range and shop equipment, or start from Garage Equipments.
Our view
Most mistakes with a tire changer come from skipping the basics: a wheel that is not clamped tight, a dry bead, or inflation without respect for the pressure limit. A good machine makes the right way the easy way.
We build our range for people who use their equipment every day, from professional mechanics and shop owners to DIY users stepping up from tire irons. That is why every product comes with a 12-month warranty, free shipping and a price-match guarantee, and why we put customer service behind the purchase.
Buy the changer and the balancer as a pair, match them to the wheels you actually see, and treat inflation as the step that needs your full attention. Get those three things right and the machines pay for themselves in time saved and wheels not scratched.
the author
FAQ
How does a tire changer break the bead?
A bead breaker, usually an air-driven shovel or paddle, presses on the sidewall next to the rim and pushes the bead off its seat. The tire must be fully deflated first. You repeat the press at several points around the tire, then do the other side.
What is the maximum pressure for seating a bead?
The procedure we cite sets a maximum of 40 psi (2.76 bar) to seat both beads. California's workplace rule also limits bead seating to 40 psi unless the manufacturer recommends otherwise, and requires a restraint device with listed exceptions. After seating, bring the tire to the pressure on the vehicle placard.
What is the difference between a swing arm and a tilt-back tire changer?
A swing arm machine moves the head out of the way sideways when you load the wheel. A tilt-back machine tilts the column backward to do the same. Both suit everyday passenger and light truck work, and the choice often comes down to workflow and shop layout.
Do I need a wheel balancer if I have a tire changer?
Yes, if you mount tires for vehicles that will be driven on the road. A changer mounts the tire, but the finished assembly still has heavy spots. A balancer finds them and tells you where to place weights, which reduces vibration and uneven wear.
Sources
- The step-by-step guide to using a tire changer, Vehicle Service Pros
- California Code of Regulations, Title 8, Section 3325
- Parts of a Tire Machine, Tire Changer Diagram Labeled
- A comprehensive guide to selecting the right tire and wheel service equipment, Vehicle Service Pros
- Wheel Balancing, U.S. Navy training manual
- Equipment product catalog, Wegmann Automotive